Prerequisite
Official GeForce Drivers NVIDIA
Ubuntu 22.04 NVIDIA Driver/CUDA/cuDNN Installation
CUDA Installation
1. Nvidia Driver
# Uninstall NVIDIA driver
sudo apt-get --purge remove "*nvidia*"
sudo apt autoremove
# Install specific version driver
sudo add-apt-repository ppa:graphics-drivers/ppa  # Add official PPA source
sudo apt update  # Check package update list
apt list --upgradable  # View upgradable package list
sudo apt upgrade  # Update all upgradable packages
# Download driver
ubuntu-drivers devices    # Ubuntu detects available drivers for NVIDIA card
sudo apt install nvidia-driver-5xx  # Install graphics driver based on your NVIDIA card
2. Download CUDA
# Download link: https://developer.nvidia.com/cuda-toolkit-archive3. Switch CUDA version:
# Check installed CUDA versions
ls -l /usr/local | grep cuda
# Open environment variables
vim ~/.bashrc
# Press 'i' to enter edit mode, paste the following commands. Press Esc, type :wq to save and exit
export PATH=/usr/local/cuda-12.6/bin:$PATH
export LD_LIBRARY_PATH=/usr/local/cuda-12.6/lib64:$LD_LIBRARY_PATH
export LIBRARY_PATH=/usr/local/cuda-12.6/lib64:$LIBRARY_PATH
# Save environment variables
source ~/.bashrc
4. CUDA uninstall:
cd /usr/local/cuda-xx.x/bin/
sudo ./cuda-uninstaller
sudo rm -rf /usr/local/cuda-xx.x
Docker Configuration:
Container Installation — Isaac Sim Documentation
1. Docker uninstall
sudo systemctl stop docker
sudo apt-get purge docker-ce docker-ce-cli containerd.io
sudo rm -rf /var/lib/docker
sudo rm -rf /etc/docker
sudo rm -rf /var/run/docker.sock
sudo groupdel docker
2. Docker download:
curl -fsSL https://get.docker.com -o get-docker.sh
sudo sh get-docker.sh

sudo groupadd docker
sudo usermod -aG docker $USER
newgrp docker

# Set Docker to start automatically on boot
systemctl enable docker
sudo systemctl restart docker

# Verify Docker
docker run hello-world
# View installed Docker images
docker images
3. Download NVIDIA Container Toolkit:
curl -fsSL https://nvidia.github.io/libnvidia-container/gpgkey | sudo gpg --dearmor -o /usr/share/keyrings/nvidia-container-toolkit-keyring.gpg \
    && curl -s -L https://nvidia.github.io/libnvidia-container/stable/deb/nvidia-container-toolkit.list | \
    sed 's#deb https://#deb [signed-by=/usr/share/keyrings/nvidia-container-toolkit-keyring.gpg] https://#g' | \
    sudo tee /etc/apt/sources.list.d/nvidia-container-toolkit.list \
    && \
    sudo apt-get update

# Install the NVIDIA Container Toolkit packages
sudo apt-get install -y nvidia-container-toolkit
sudo systemctl restart docker

# Configure the container runtime
sudo nvidia-ctk runtime configure --runtime=docker
sudo systemctl restart docker

# Check nvidia-smi
docker run --rm --runtime=nvidia --gpus all ubuntu nvidia-smi
docker run --rm -it --gpus all ubuntu:22.04 /bin/bash
# When starting CUDA in Docker, make sure to match the Ubuntu version of your host machine
# Check corresponding versions here: https://gitlab.com/nvidia/container-images/cuda/blob/master/doc/supported-tags.md- Docker + Nvidia container toolkit: Configure GPU Deep Learning Environment with NVIDIA Container Toolkit and Docker
- Ubuntu22.04 Install Docker, nvidia-docker, NVIDIA Container Toolkit - Effective Installation Guide
- Issue Resolution Record 1: nvidia-container-cli: initialization error: load library failed
- Docker: Error response from daemon: failed to create shim task: OCI runtime create failed: runc create failed · Issue #1648 · NVIDIA/nvidia-docker
- Some packages can be pulled from https://hub.docker.com/search
Isaac Ros Workspace Setup
1. Restart docker
sudo systemctl daemon-reload && sudo systemctl restart docker2. Install Git LFS
sudo apt-get install git-lfs
git lfs install --skip-repo
3. Create ROS2 Workspace
mkdir -p  ~/workspaces/isaac_ros-dev/src
echo "export ISAAC_ROS_WS=${HOME}/workspaces/isaac_ros-dev/" >> ~/.bashrc
source ~/.bashrc
4. Create isaac_ros_common
cd ${ISAAC_ROS_WS}/src && \
   git clone -b release-3.2 https://github.com/NVIDIA-ISAAC-ROS/isaac_ros_common.git isaac_ros_common
5. Quick start assets
sudo apt-get install -y curl jq tar

NGC_ORG="nvidia"
NGC_TEAM="isaac"
PACKAGE_NAME="isaac_ros_visual_slam"
NGC_RESOURCE="isaac_ros_visual_slam_assets"
NGC_FILENAME="quickstart.tar.gz"
MAJOR_VERSION=3
MINOR_VERSION=1
VERSION_REQ_URL="https://catalog.ngc.nvidia.com/api/resources/versions?orgName=$NGC_ORG&teamName=$NGC_TEAM&name=$NGC_RESOURCE&isPublic=true&pageNumber=0&pageSize=100&sortOrder=CREATED_DATE_DESC"
AVAILABLE_VERSIONS=$(curl -s \
    -H "Accept: application/json" "$VERSION_REQ_URL")
LATEST_VERSION_ID=$(echo $AVAILABLE_VERSIONS | jq -r "
    .recipeVersions[]
    | .versionId as \$v
    | \$v | select(test(\"^\\\\d+\\\\.\\\\d+\\\\.\\\\d+$\"))
    | split(\".\") | {major: .[0]|tonumber, minor: .[1]|tonumber, patch: .[2]|tonumber}
    | select(.major == $MAJOR_VERSION and .minor <= $MINOR_VERSION)
    | \$v
    " | sort -V | tail -n 1
)
if [ -z "$LATEST_VERSION_ID" ]; then
    echo "No corresponding version found for Isaac ROS $MAJOR_VERSION.$MINOR_VERSION"
    echo "Found versions:"
    echo $AVAILABLE_VERSIONS | jq -r '.recipeVersions[].versionId'
else
    mkdir -p ${ISAAC_ROS_WS}/isaac_ros_assets && \
    FILE_REQ_URL="https://api.ngc.nvidia.com/v2/resources/$NGC_ORG/$NGC_TEAM/$NGC_RESOURCE/\
versions/$LATEST_VERSION_ID/files/$NGC_FILENAME" && \
    curl -LO --request GET "${FILE_REQ_URL}" && \
    tar -xf ${NGC_FILENAME} -C ${ISAAC_ROS_WS}/isaac_ros_assets && \
    rm ${NGC_FILENAME}
fi
Isaac Sim
Installation (Workstation)
1. Download
Download Isaac Sim — Isaac Sim Documentation
2. Workstation Installation
mkdir ~/isaacsim
cd ~/Downloads

cd ~/isaacsim
./post_install.sh
# Running this command will open the app selector, where you can choose built-in ROS environment and ROS bridge
./isaac-sim.selector.sh

# Running this command will directly launch the program
 ./isaac-sim.sh
3. ROS2 Installation
- Local download: ROS2 humble
Note: Source ROS2 workspace!!
source /opt/ros/humble/setup.bash - ROS bridge extension
Window->Extensions and search for ROS 2 bridge - Set up Isaac Sim ROS Workspaces
Download workspace: isaac-sim/IsaacSim-ros_workspaces: Isaac Sim ROS Workspaces
Download related packages:
# For rosdep install command
sudo apt install python3-rosdep python3-rosinstall python3-rosinstall-generator python3-wstool build-essential
# For colcon build command
sudo apt install python3-colcon-common-extensions

cd humble_ws
rosdep install -i --from-path src --rosdistro humble -y

colcon build

# Need to run source before starting Isaac Sim each time
source install/local_setup.bash
Nav2:
ROS2 Navigation — Isaac Sim Documentation
1. Installation
sudo apt install ros-<ros2-distro>-navigation2
sudo apt install ros-<ros2-distro>-nav2-bringup
2. Occupancy Map
ROS2 Navigation — Isaac Sim Documentation
3. Running
- Startup process:
# Terminal 1
cd ~/isaacsim
./isaac-sim.selector.sh

# Terminal 2
cd ~/IsaacSim-ros_workspaces
cd humble_ws
source install/local_setup.bash
ros2 launch carter_navigation carter_navigation.launch.py- Load example:
Window > Examples > Robotics Examples then open ROS2 > Navigation > Carter
Play - Pose Estimate
- Nav2 Goal
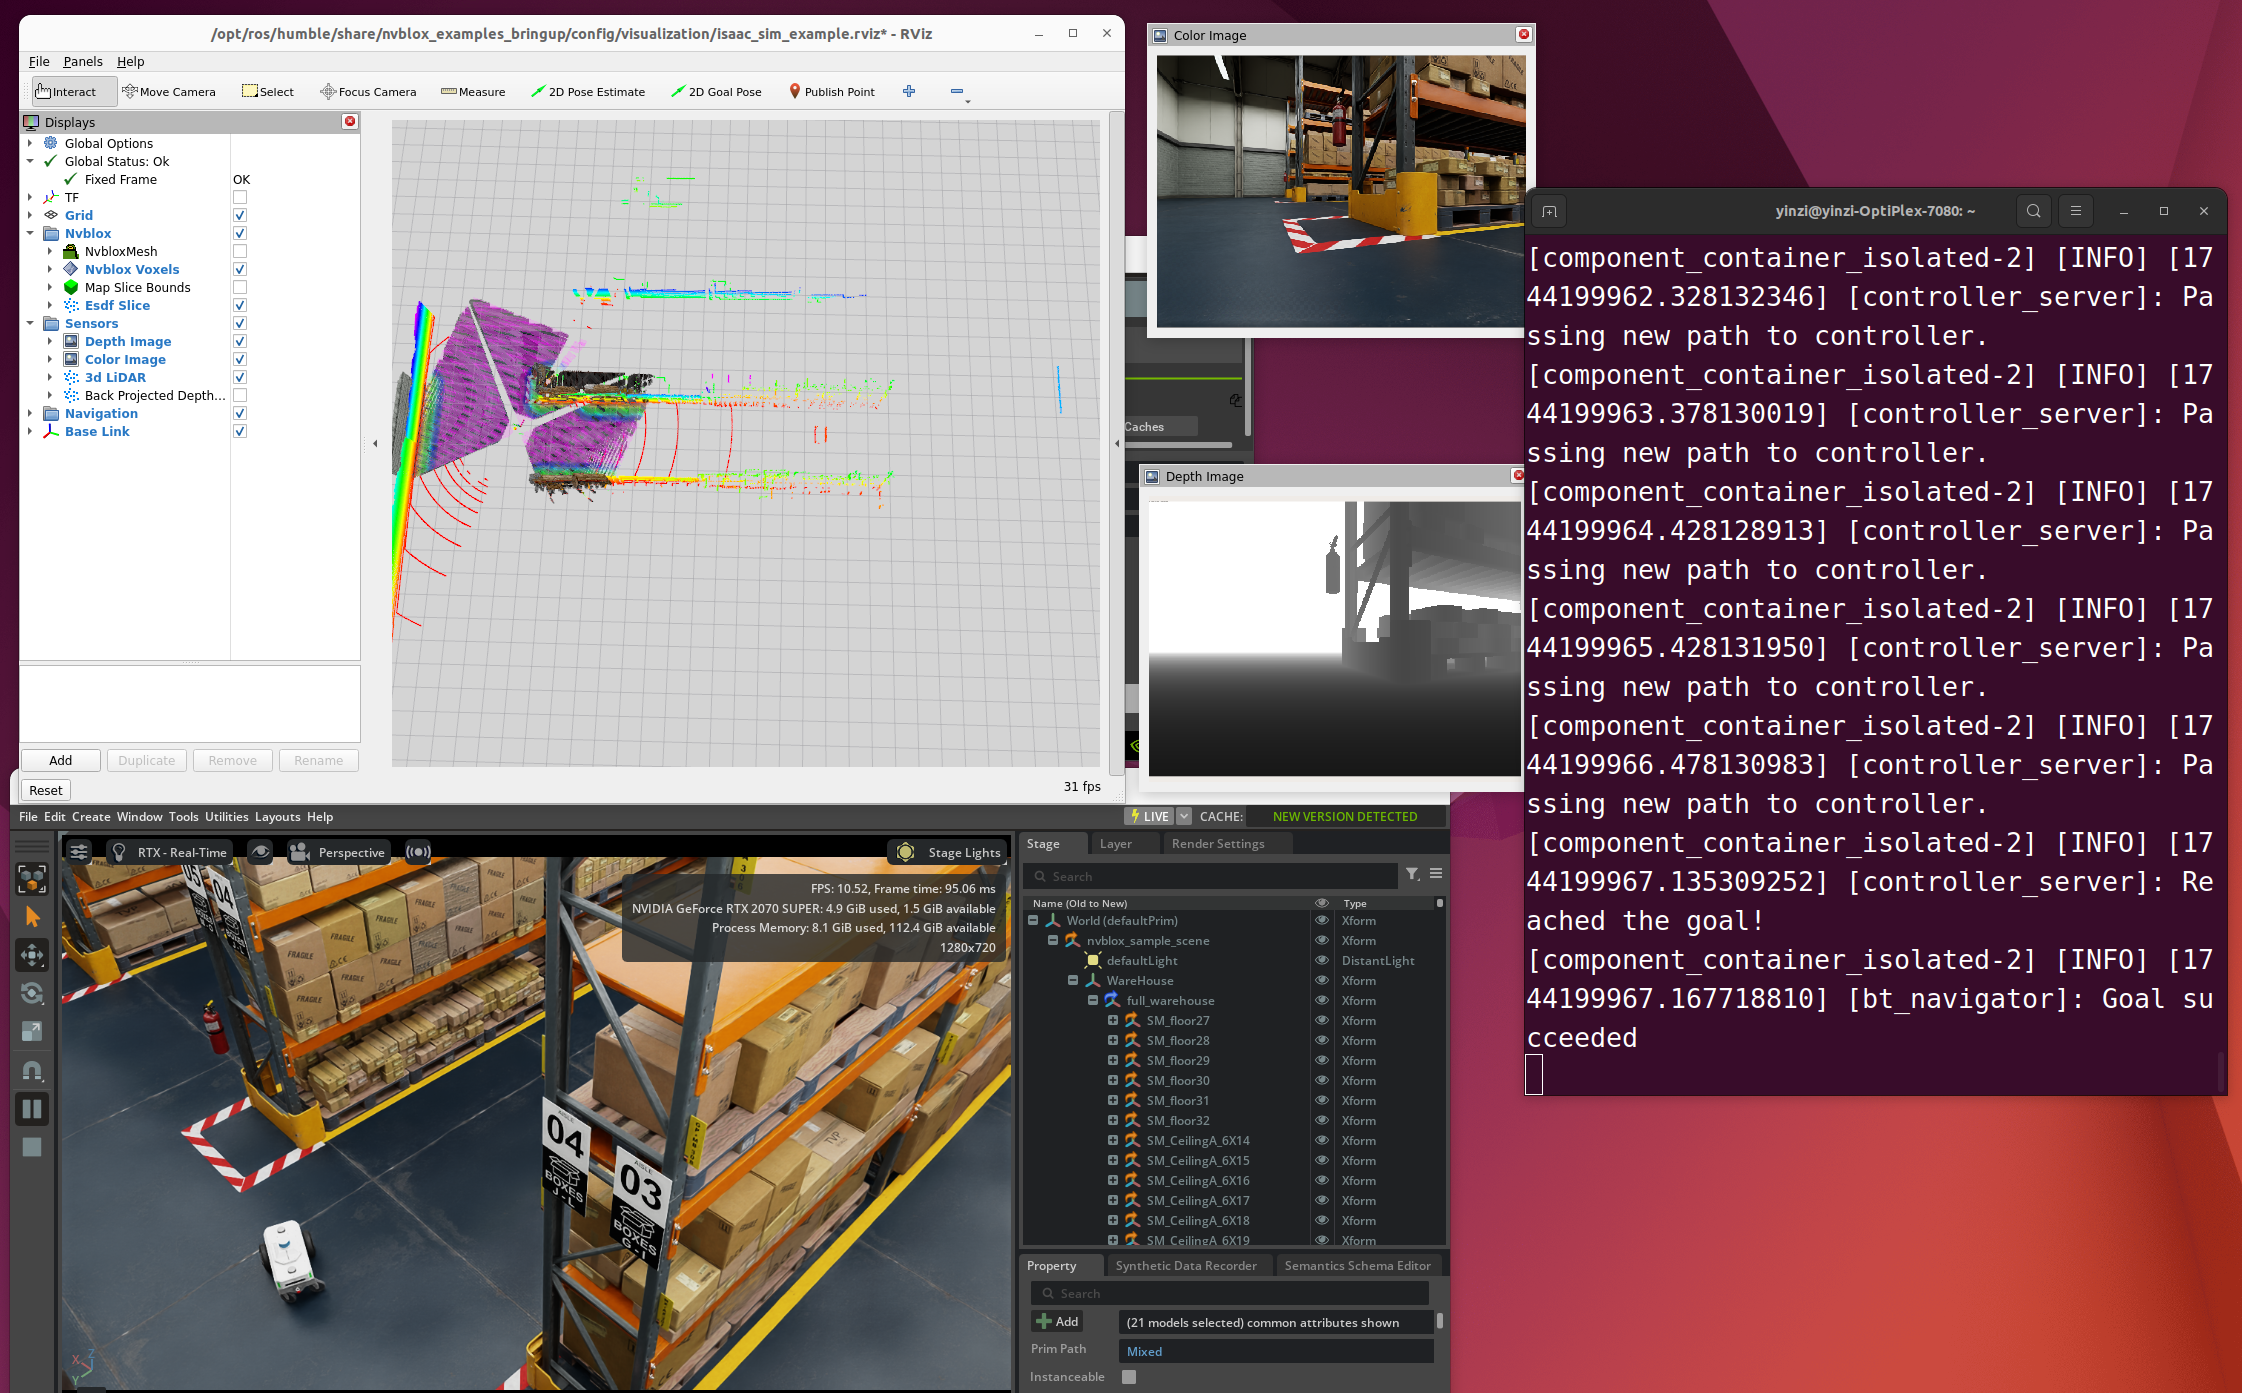
NVBlox:
1. First complete the prerequisite environment configuration:
[ IsaacSim 4.5 Workstation - Nav2/VSlam](https://c1afcru08q1.feishu.cn/docx/GOsVd7UgWoW4HtxKCtWcPhIdnBc#share-IanndP7T0ou8wLxZ014cOsOonud)
2. isaac_ros_nvblox:
# Launch docker container
cd $ISAAC_ROS_WS && ./src/isaac_ros_common/scripts/run_dev.sh
# Install isaac_ros_nvblox and its dependencies. (May need to run this again for sourcing when restarting Docker)
sudo apt-get update
sudo apt update &&
sudo apt-get install -y ros-humble-isaac-ros-nvblox && \
rosdep update && \
rosdep install isaac_ros_nvblox
ros2 launch nvblox_examples_bringup isaac_sim_example.launch.py \
rosbag:=${ISAAC_ROS_WS}/isaac_ros_assets/isaac_ros_nvblox/quickstart \
navigation:=False3. Reconstruction + Nav2
- The source before running launch should use this: [ IsaacSim 4.5 Workstation - Nav2/VSlam](https://c1afcru08q1.feishu.cn/docx/GOsVd7UgWoW4HtxKCtWcPhIdnBc#share-DrtGdxZGSoVHnLxUbGecTRFTnab)
cd $ISAAC_ROS_WS && ./src/isaac_ros_common/scripts/run_dev.sh

cd /workspaces/isaac_ros-dev

export FASTRTPS_DEFAULT_PROFILES_FILE=/usr/local/share/middleware_profiles/rtps_udp_profile.xml

ros2 launch nvblox_examples_bringup isaac_sim_example.launch.py
# It's recommended to start isaac-sim-selector first
./isaac-sim.selector.sh
# In the selector GUI interface, first Clear cache, then Open in terminal
./isaac-sim.sh⚠️Crash:
After clicking play, a crash prompt may appear or after running Nav2 for a while, you may see: llvm: out of memory
At this time, you need to downgrade the NVIDIA Driver version. According to official recommendations, it should be >= 535.129.03
If crash occurs again during runtime, keep the nvblox terminal and restart IsaacSim
⚠️Error:
[Error] [omni.sensors.nv.lidar.lidar_core.plugin] CUDA Driver CALL FAILED at line 522: the provided PTX was compiled with an unsupported toolchain.
[Error] [omni.sensors.nv.lidar.lidar_core.plugin] CUDA Driver CALL FAILED at line 548: named symbol not found
# </path/to/isaac_sim_installation> is the download path of IsaacSim files
export LD_LIBRARY_PATH=</path/to/isaac_sim_installation>/extscache/omni.sensors.nv.common-2.5.0-coreapi+lx64.r.cp310/bin:$LD_LIBRARY_PATH- RVIZ2:
Selecting 3D LiDAR can perceive objects in a large range, which can assist in goal selection during navigation
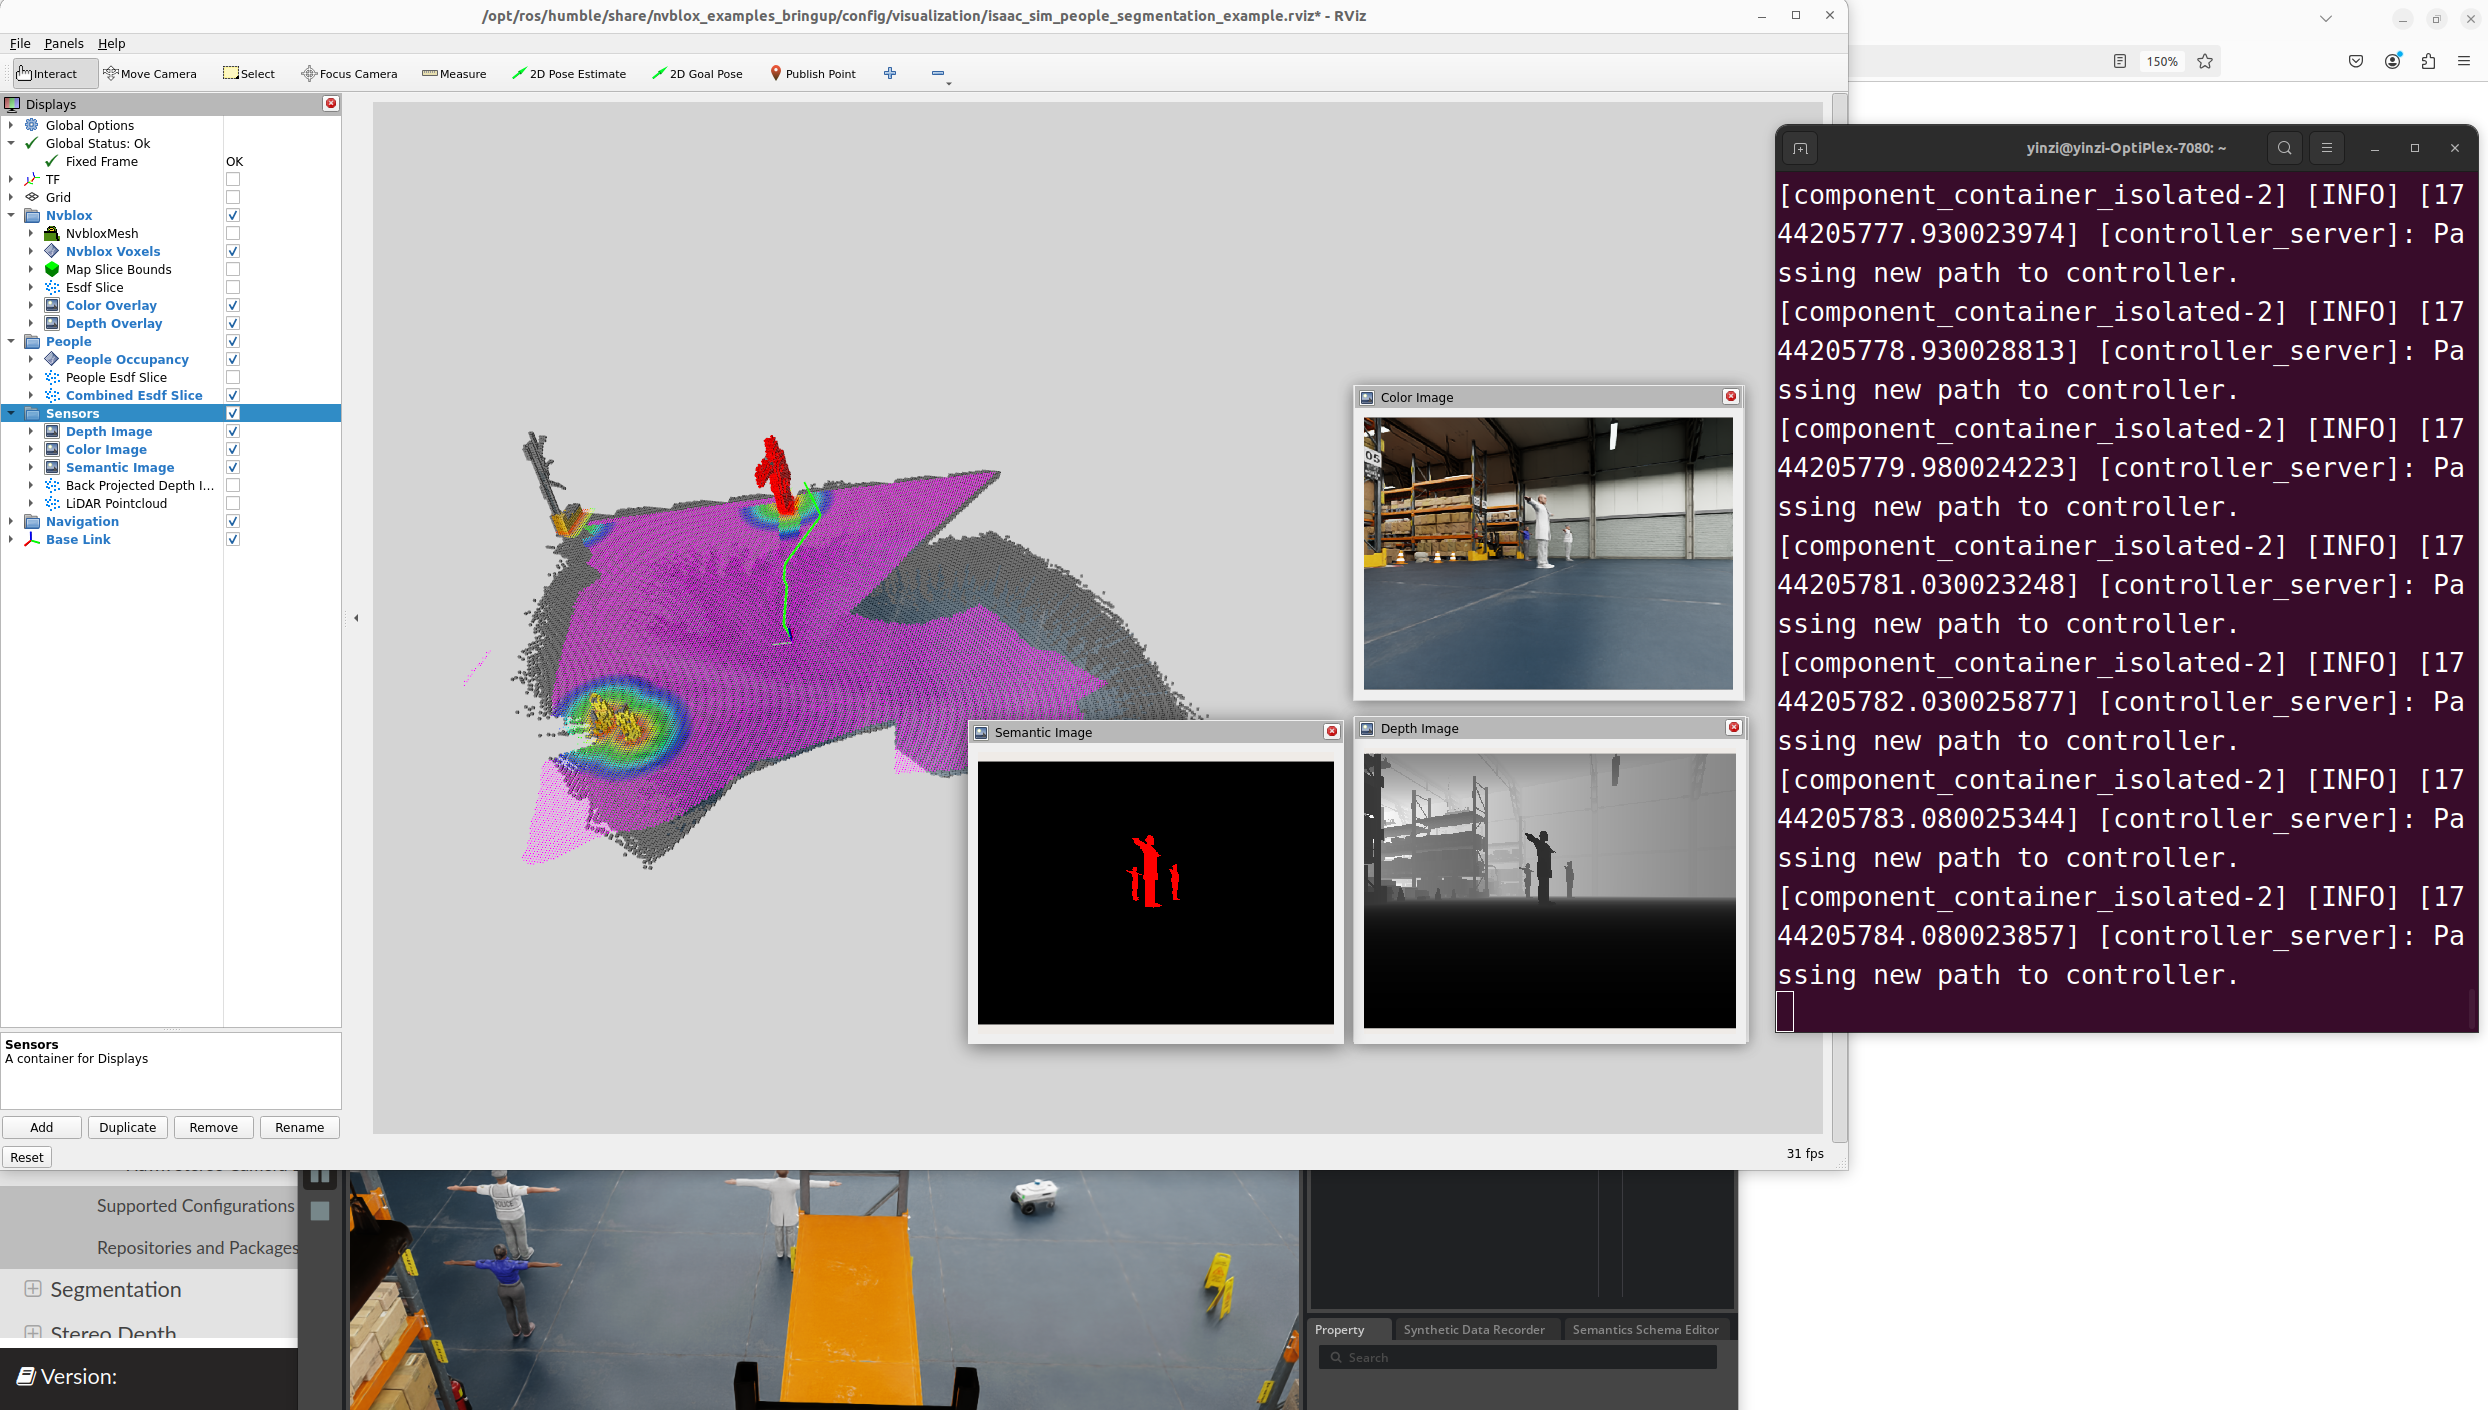
4. Reconstruction + Semantic image
Visual SLAM
1. First complete the prerequisite environment configuration:
[ IsaacSim 4.5 Workstation - Nav2/VSlam](https://c1afcru08q1.feishu.cn/docx/GOsVd7UgWoW4HtxKCtWcPhIdnBc#share-IanndP7T0ou8wLxZ014cOsOonud)
⚠️Error: [Failed to initialize CUVSLAM tracker: 4]
2. isaac_ros_visual_slam environment configuration
cd ${ISAAC_ROS_WS}/src/isaac_ros_common && \
./scripts/run_dev.sh

sudo apt-get update
# Need to source with this before each launch
sudo apt-get install -y ros-humble-isaac-ros-visual-slam
3. Run Launch File
# Terminal 1
sudo apt-get update
sudo apt-get install -y ros-humble-isaac-ros-examples
# Using quickstart
ros2 launch isaac_ros_examples isaac_ros_examples.launch.py launch_fragments:=visual_slam \
interface_specs_file:=${ISAAC_ROS_WS}/isaac_ros_assets/isaac_ros_visual_slam/quickstart_interface_specs.json \
rectified_images:=false
# Terminal 2
cd ${ISAAC_ROS_WS}/src/isaac_ros_common && \
./scripts/run_dev.sh
# This is used to start the camera, run after Terminal 3 is complete
ros2 bag play ${ISAAC_ROS_WS}/isaac_ros_assets/isaac_ros_visual_slam/quickstart_bag --remap \
/front_stereo_camera/left/image_raw:=/left/image_rect \
/front_stereo_camera/left/camera_info:=/left/camera_info_rect \
/front_stereo_camera/right/image_raw:=/right/image_rect \
/front_stereo_camera/right/camera_info:=/right/camera_info_rect \
/back_stereo_camera/left/image_raw:=/rear_left/image_rect \
/back_stereo_camera/left/camera_info:=/rear_left/camera_info_rect \
/back_stereo_camera/right/image_raw:=/rear_right/image_rect \
/back_stereo_camera/right/camera_info:=/rear_right/camera_info_rect# Terminal 3
cd ${ISAAC_ROS_WS}/src/isaac_ros_common && \
./scripts/run_dev.sh
# Run RViz
rviz2 -d $(ros2 pkg prefix isaac_ros_visual_slam --share)/rviz/default.cfg.rviz